Search This Blog

Wednesday, February 25, 2015

Brisket Barley Soup. Or, Keeping Warm in this Never-ending Winter

So much for a milder winter to make up for last years deep freeze.  True, it is not as bad as last year.  We have been able to practice a few times for the upcoming season, but the last few weeks have made up for the slow start to winter with temperatures as low as -20 F in the morning.  Sure, we do not have it as bad as my Canadian friends or those from Minnesota.  But, I have had it.  See what I mean?


I am thinking of moving to the Carolinas.  Or, maybe we will win the Powerball and buy a small Caribbean island?  Well, neither of those options are going to happen any time soon.  So, in order to cope, it was time to come with with some meals to warm you up.

A friend of ours from the BBQ circuit, John from Eatapedia, posted a nice recipe making beef stew from leftover brisket.  Then, a colleague from work took a brisket I smoked for him and turned it into a tomato based brisket barley chili.  I just happened to have some leftover brisket from a recent practice.


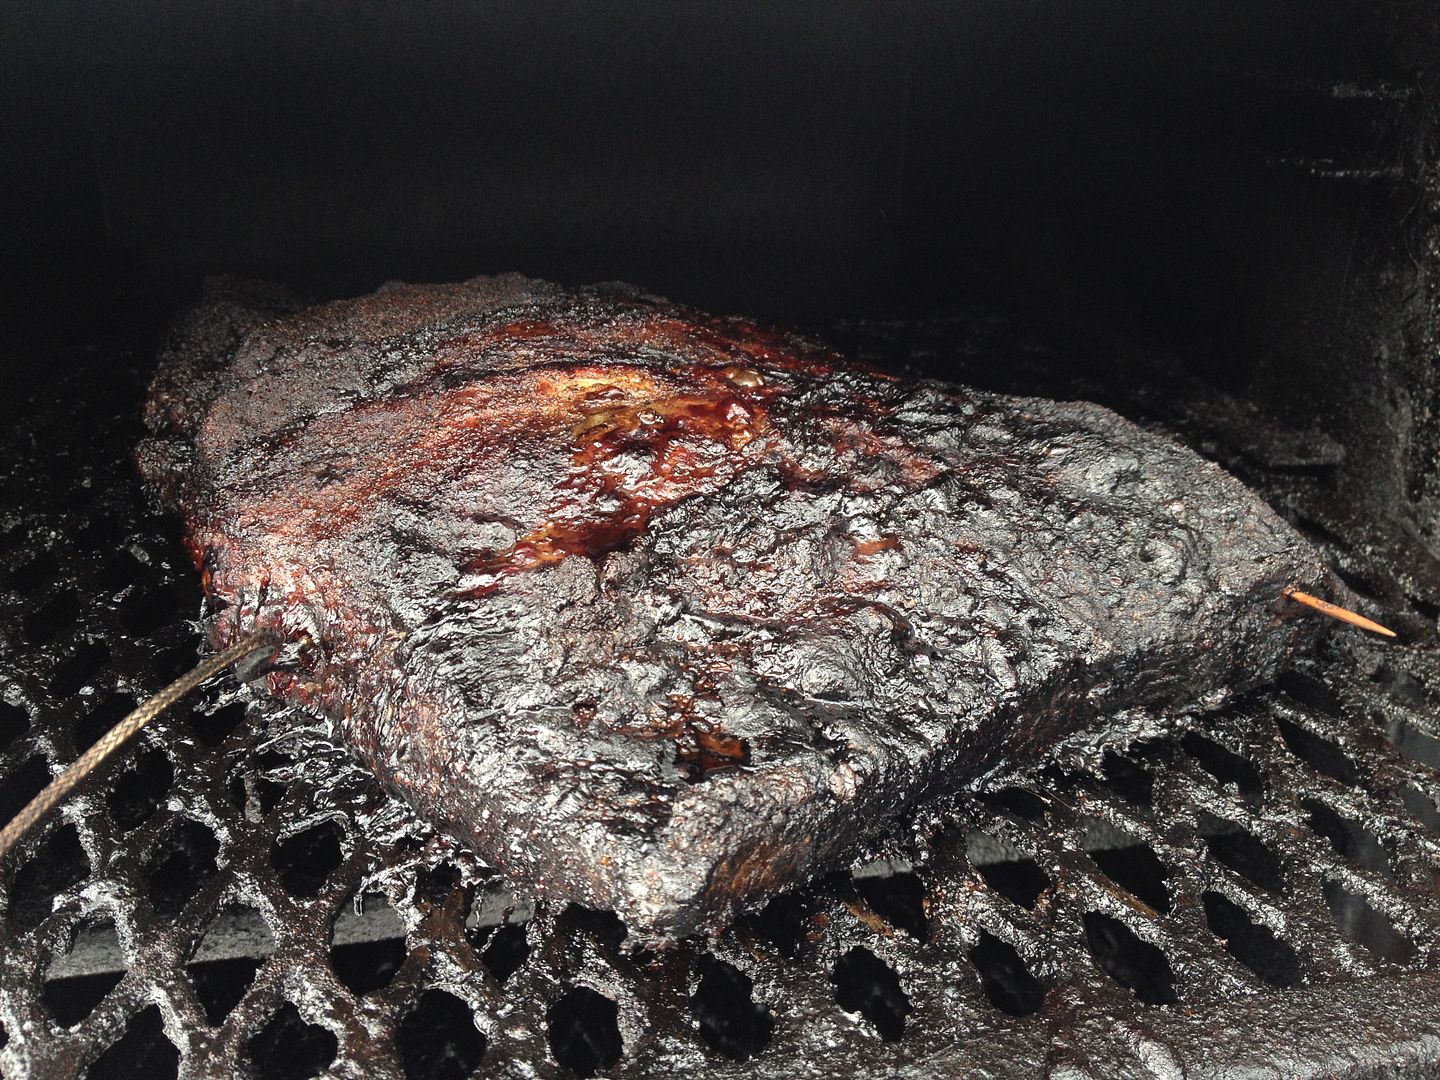
I had some leftover point (the fatty juicy end) and some leftover flat (the lean end that some of you may equate with pastrami or smoked brisket slices).  So, with my leftovers, I took my two inspirations and combined them into one.  I give you Brisket Barley Soup with Wild Rice and Roasted Veggies.

First, the ingredients.

Brisket Barley Soup

1 lb of smoked brisket, chunked.  I used a mix of point and flat.  Either will work fine.  Don't have any smoked brisket?  Stew meat will work.  Just cube to the size you want and cook while simmering for at least 12 minutes.  Longer if you want your beef more tender.
2, 48 oz cans of low fat beef broth (12 cups).  You can make your own as well
3 large carrots, peeled and chunked
3 ribs of celery, cut into 1/2" pieces
1, 8 oz package of button mushrooms, cleaned and quartered
1, small sweet onion, quartered
2 cups of cooked barley
1, 5 oz package of long grain wild rice, cooked
Olive oil for roasting the veggies
Salt and pepper for roasting the veggies

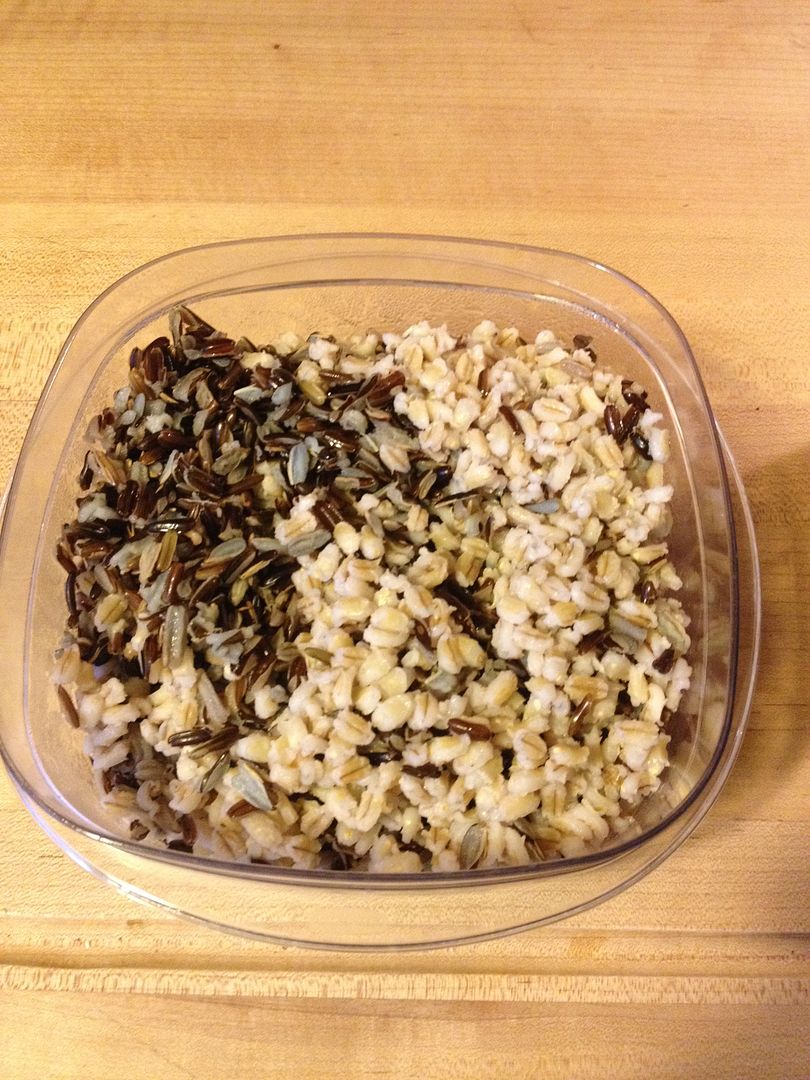
I bought the uncooked, whole grain barley.  Why?  Of all things the store was out of that day.  Everyone must have had vegetable soup on their mind that weekend with the impending winter storm.  There was a run on milk, bread, toilet paper, and quick barley.  You can never have enough of either during a winter emergency.  Right.  Anyway, I rinsed 1/2 cup of the barley and cooked according to the package instructions.  Barley expands four times during the cooking process, so I ended up with two cups.  Next, I cooked the wild rice, a last second addition to this recipe.  Why?  Because it was next to the empty row of quick barley.  After cooking, I cooled and placed in the refrigerator for use the next day.


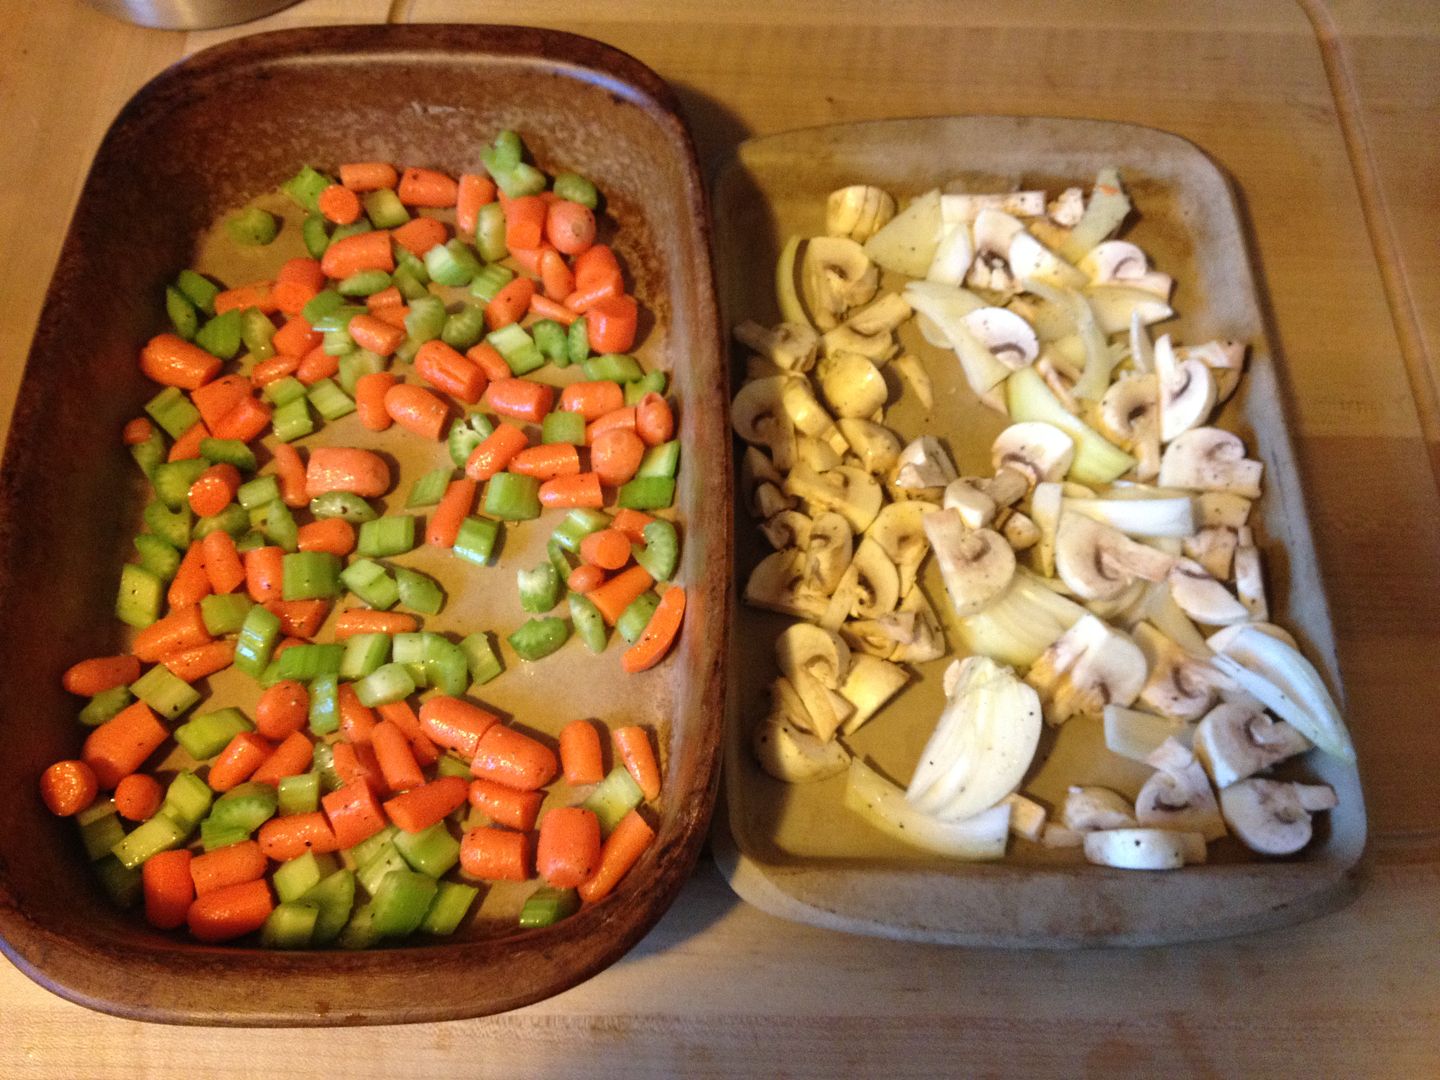
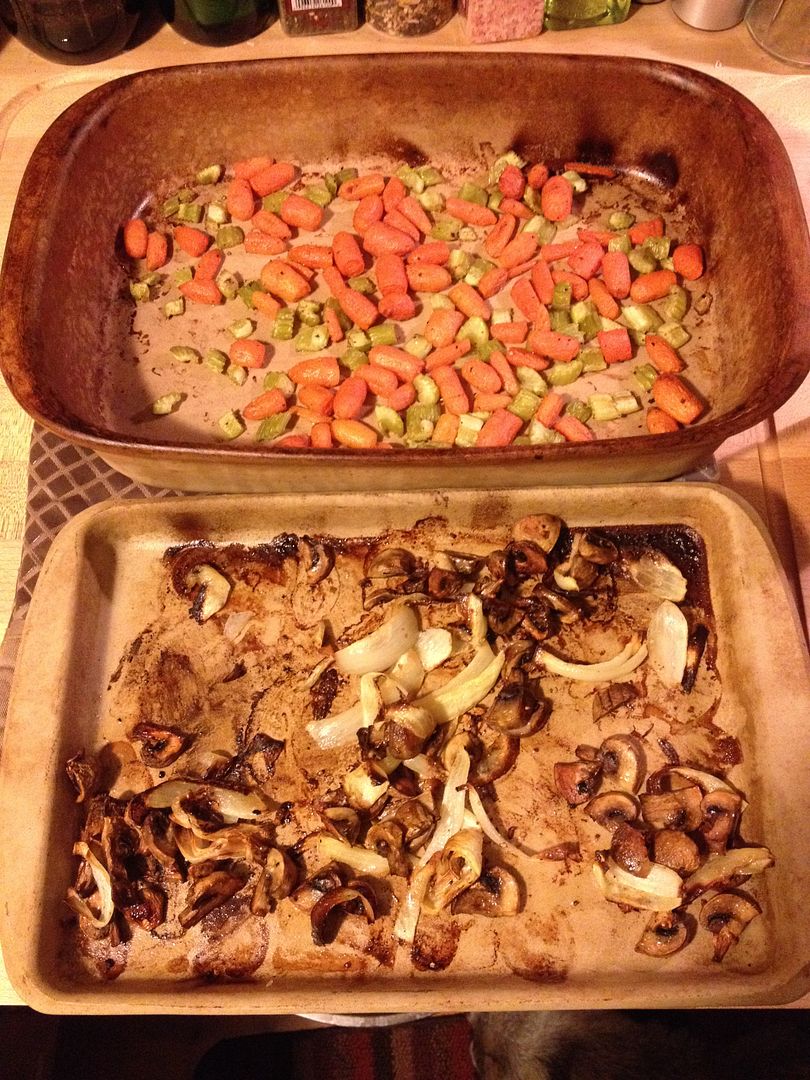
The next day, I roasted my carrots and celery in one pan and my mushrooms and onions in another.  I used about 2 tsp olive oil to coat each and added salt and pepper to taste.  The carrot/celery mixture was roasted in the oven at 400 F for one hour and the mushroom/onion mixture was roasted at 350 F for one hour.  Here is the before and after.


While the veggies and fungi were roasting, I placed my beef broth in dutch oven and brought to a boil, added my chunked brisket, and lowered the heat to a simmer.  Here is the chucked brisket for an idea on size.


I went with the larger sized chunks knowing that during the simmer time with the broth, the chunks would break down into medium sized pieces of brisket.  I didn't want strained baby food consistency.

So, when the veggies were done and after about 30 minutes of the simmering beef and broth, I added my veggies, fungi, and barley/rice mixture.  I brought the mixture back to a simmer and let it cook for 30 more minutes.


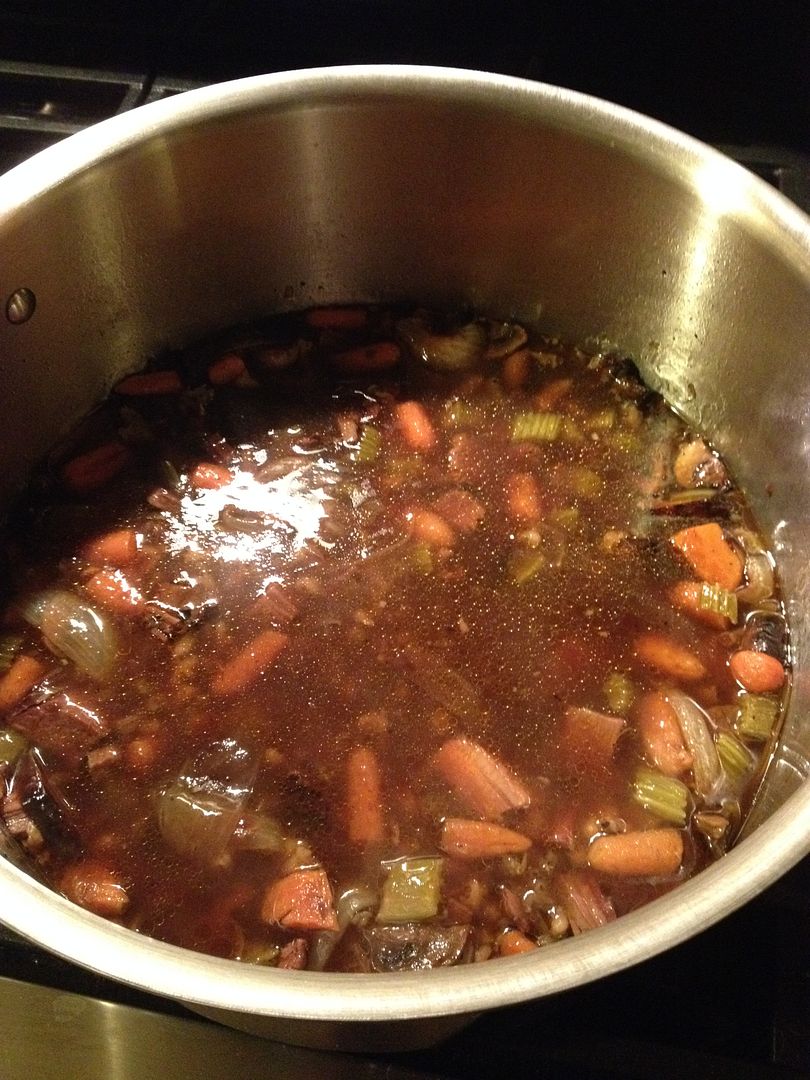
Not the best final picture I have taken, but you get the idea.  The veggies and mushrooms contributed a nice caramelized component to this soup.  The barley and rice added some texture.  As for the brisket, the bark from the Oakridge Black Ops brisket rub flavored the broth perfectly.  There was even that slight smokey taste that comes with a smoked brisket.  A perfect hearty soup for a cold winter day.

Thanks for stopping by,

Bill

Monday, February 16, 2015

The SLT (Steelhead, Lettuce, and Tomato)

Over the holidays this past year, I was a bacon making machine.  I was curing and smoking.  Hope was slicing and packaging.  In the middle of that pork belly mayhem, I was looking at a steelhead fillet in the freezer and wondered to myself if I could turn a steelhead fillet into a slab of bacon like goodness.  If they can turn turkey or tofu into "bacon", I can try it with a nice meaty fish.  Right?  A plan was coming together.  Cure, smoke, hot pan sear, fresh bread, tomato, lettuce, and mayo.  The SLT was in my future.

Later that week, I drove to my local pond (Costco) to go fishing for a nice steelhead.  I approached the end case and started trolling for the perfect fish.  It was tough battle, back and forth as these battles can be from time to time.  But, after dodging a cart full of screaming kids and negotiating the 20 deep line for a free sample of Prepacked Demo Product Reheated in a Electric Skillet, I had my prize.  Genuine hand caught, farm raised steelhead fillet.


After getting home, I froze one of the fillets for later use and started preparations for my steelhead "bacon" (I hope).  

First, I whipped up a batch of our apple cider bacon cure:

2 oz Cure Salt (Prague Powder #1)
10 oz Kosher Salt
4 oz. Sugar
1/2 Gallon Apple Cider
1/2 Gallon Water
For our sugar source, we used turbinado sugar, otherwise known as Sugar in the Raw at your grocery store. 

I chilled the brine down, then released the steelhead into the brine for one final two day swim.  After two days in the brine, I removed the steelhead fillet and soaked in cold water for about 30 minutes to remove the excess salt.  Then I cut my fillet in half for some experimentation.  


The larger piece was smoked as is.  No rub, no flavoring.  This would be my "bacon".  The smaller piece was rubbed with Oakridge BBQ Game Bird and Chicken rub, one of my favorite non-competition rubs.  

Upon closer inspection of the larger piece, I noticed that the fat on the belly part of the fillet had taken on that waxy look that pork belly fat has before smoking.  Was I on to something?  To be determined.


I brought my smoker up to 165 F and added one piece of hickory into the ash pan.  I didn't want to over smoke this fillet.  I just wanted the light hickory flavor that is reminiscent of bacon.  I smoked the fillet until the fish was starting to flake and the fat was starting to render from the meat, about two hours.


When finished, I brought the fillet inside and placed in a plastic bag to age for two days.  Aging the fish in the refrigerator mellows the smoke flavor, allowing the flavors to mingle.


After the two day wait, I prepared for part two of this experiment.  I had some sliced tomato, lettuce, and crusty French bread at the ready.  I also prepared some sriracha mayo to top my sandwich.  Then, I removed a portion of the unrubbed fillet and prepared to sear.


For searing, I added a touch of olive oil to a sauté pan and turned my burner to medium heat.  Once the oil was hot, I slightly seared the meaty side, then flipped the fillet over and seared until the skin was nice and crispy.


Next it was time to assemble the sandwich.


I am happy to report that this sandwich was pretty good.  Light hickory flavor and a hint of apple from the brine.  Crispy skin, crusty bread, and a bit of kick from the sriracha mayo.  Was it like bacon?  I am sorry to say no.  This was a great piece of smoked fish, but bacon is better left for pork.  I will make this sandwich again.  But I will not be expecting bacon at all.  As for the portion of the fish rubbed with the Oakridge game bird rub, the flavor was outstanding.  The Oakridge Game Bird and Chicken rub never lets me down, no matter what dish I prepare using this product.

Thanks for stopping by,

Bill

Wednesday, February 11, 2015

Quesadilla Style Pizza

It was early in the day Super Bowl Sunday.  We had yet to be excited by the best catch in the history of the game to be followed by the worst play call in the history of organized football.  On our minds was the topic of eats.  What to make?  After looking through the refrigerator, we decided upon a traditional go to meal for the big game.  Pizza.  Hope and The Youngest wanted a traditional pie with sausage, pepperoni, and cheese.  I was looking for something different.

I set forth to rummaging through the refrigerator for some ideas.  Perhaps Greek yogurt and spinach? Nah.  Olives, broccoli, and processed cheese product?  Nope.  My eyes fell upon the batch of pinto beans I had made the day before.  It had been awhile since I had indulged in some Mexican fare.  I had just bought a chunk of Thunderjack cheese the other day.  Hmmm, a plan was developing.  Lets to go back to the pinto beans and start from the beginning.

My mom has made pinto beans for years.  Beans are not every ones cup of tea, but I grew to like them.  No, actually love them.  Beans of all types prepared in many ways.  But, my go to dish is Mom's good old pinto bean recipe.  Quick, simple, and great with some stovetop Mac and Cheese and a wedge of corn bread.  Here is the recipe:

Homemade Pinto Beans:

1 lb dried Pinto Beans.  Rinsed and stones removed.
1 small sweet onion, roughly diced.
1 bell pepper, roughly diced.
4 cloves of garlic, minced.
1 Tbsp of freshly ground pepper.
2 tsp ground cumin
Salt to taste.

I soak my beans over night.  You don't have to do this, but I think that it provides a smoother bean after cooking.  After soaking overnight, drain your beans and rinse with cold water.  Place the beans and all of your ingredients, except the salt into a pot with enough water to cover and an inch more.  if you cook with the salt at the beginning, you will end up with a tough bean that is no fun to eat.  Bring your pot to a boil, then simmer your beans for three hours.  I crack the lid on my pot so that I reduce the amount of liquid a bit while cooking.  Why?  I like a thicker bean.  After cooking, remove the beans from the heat and add salt to taste.  You could add a hamhock or some bacon while cooking, but I like the pintos just like this.  Here was my last batch.


How was I going to incorporate beans into a pizza?  Refried beans of course.  This recipe is quick and simple and way better than any refried bean you will get at a Mexican restaurant.

Homemade Refried Beans:

One cup of your Pinto Beans, plus the liquid.
1/4 cup shredded four cheese Mexican blend.
Olive Oil for your pan.

First, get a small skillet and add just enough olive oil to prevent your beans from sticking.  Turn your burner to medium heat.  Once the oil is starting to shimmer, twirl your pan to coat all surfaces and add your beans.  Then, start mashing your beans with a potato masher.


Once you get your beans to the consistency you want, add the cheese and mix until melted and combined.


I do not mash my beans until they look like something that comes out of a baby food jar.  I like some texture to my refried beans.  I would say the biggest chunks are about 1/4"


Now, for the pizza.  First, Hope made a batch of pizza dough.  Here is the recipe.  It is Jeff Smith's The Frugal Gourmet Cooks Italian Recipe...

Pizza Dough

3 1/4 cups AP flour
1 tbsp yeast
1/4 tsp sugar
1 tsp salt
2 tbsp olive oil
1 1/4 cups warm water

Put all of the ingredients into a bread machine, yeast on the bottom.  Hit start and let your machine go through one knead and raise cycle.  Then remove your dough from the bread maker and cover with a clean towel for 15 minutes to raise.  When handling the dough, spray your hands with cooking spray.  You'll thank me later...

Quesadilla Style Pizza:

1/2 of our Pizza Dough recipe
1 cup of Refried Beans
Enough sliced Thunder Jack Cheese to cover your pie
1/2 small Red Onion, diced
2 oz Black Olives
Hot Peppers, sautéed in oil, to taste.  You could use sweet if you like

Lets run through the ingredients.

Thunder Jack Cheese is the best Co Jack I have found at our local grocery store.  It can be found in the specialty case of your local Big Bird.  It is better than any pepper jack cheese I have ever found.  It has that great Co Jack flavor with big hunks of real pepper.  I could eat the whole block myself.


Next up, the hot peppers in oil.  I have found a great product from Suhey's Peppers.  Suhey, sound familiar?  Yes, these peppers are made by the same Matt Suhey that rumbled through the Penn State backfield back in the day.  It is tough for a Pitt guy to like this product, but I have put my college rivalry aside.  These peppers are perfectly spiced and prepared with whole cloves of garlic.  These peppers top out on the top of the heat scale.  Blazing hot, but not in an obnoxious way.  They add lots of flavor to any dish.  I have even started adding them to my tossed salads.  Warning though, they are not for the capsicum challenged.  Suhey's does make a sweet variety that is just as good.  I recommend either.


So, I built my pizza.  I spread my refried beans on my crust, then topped with the cheese, onion, olives, and peppers.


I fired up our new toy, the Pizzakettle, then cooked this pie in no time. Seven minutes to be exact, with one 180 degree turn halfway through the cook.


Seriously, this pizza was everything I had hoped for and more.  Was this a quesadilla or an open faced bean burrito?  The inner part of the pie was like a bean burrito that had been grilled due to the crispy crust on the bottom.  The outer edges were more like a crispy happy hour quesadilla.  This pizza had it all.  The beans crisped up on the outer edges and so did the cheese.  The oil from the peppers slightly caramelized the red onion.  Everything just came together.  There are even options for future versions of this pie.  Why not add some grilled shrimp or chicken breast?  I just might try the shrimp the next time.  One thing I will change the next time I make this is to use more refried beans.  Perhaps a double recipe the next time.  The outer edges could have used a little more bean coverage.

Thanks for stopping by,

Bill

Thursday, February 5, 2015

Product Review - Hot Grips Silicone Rubber BBQ Gloves

Pure impulse buy.  That is all that I have to say for myself.  I was tooling through Facebook one evening and saw an introductory offer for these gloves from Hot Grips for $9.99 ($12.49 after shipping).  I have many pairs of silicone heat resistant gloves.  Some are in mitt form and some are gloves.  While they work well for heat resistance, they are not so good with slippage as they are not textured.  I have dropped a pork butt or two in my time.  So, I heard the sirens call and ordered mine to try out with some ribs I was making that upcoming weekend.  By that Friday, my package had arrived and by Saturday the testing began.


As an added bonus, they even enclosed a handy little silicone sauce brush.


According to their product claims on Amazon, these gloves are heat resistant up to 425 F, fit almost any hand, are slip resistant providing a strong grip, and are dishwasher friendly.  Let's move on and put these gloves through the paces.

1.  Strong grip and flexible.  Check.  They passed the flexibility test.  I was able to make a fist with no problem.


2.  Slip resistant.  These gloves are textured with little heart shaped dimples, allowing you to handle your BBQ with tender loving care.


Between the flexibility of the glove and the slip resistance of the dimples, I was able to handle hot racks of ribs and full pork butts with no issues.  No slips.  No searing pain on my finger tips from gripping large hunks of smoked meat.

3.  One size fits most.  Very true.  I do not have the biggest hands in the world.  I would say they are averaged sized.  I cannot palm a basketball.  Nor can I properly grip a regulation NFL football inflated to mandated league pressure.  They did not slide off easily.  If you have an above average sized hand, you might get by.  If you have big meat hooks, taking these gloves off might be like trying to pull on over the shoe galoshes.

4.  Heat resistance.  As advertised.  No issues at all with heat.

5.  Fine motor skills.  Taking foil off of a half steamer pan was a bit of an issue.  After 30 seconds of futility, I removed the gloves and took the foil off bare handed.

6.  Dishwasher safe.  Yes, they are.  I made sure to get these gloves all slopped up with grease, BBQ sauce, and BBQ pit mojo.


I ran the gloves through a standard wash cycle in our dishwasher.  The grease and sauce came right off as expected.  The BBQ pit mojo, not so much.  There were some minor smudges of mojo remaining.


Overall, I would recommend these gloves for your BBQ arsenal.  Especially if you can pick them up for $9.99.  They performed as advertised, just lacking a bit in the clean up category due to the residual mojo remaining on the glove after cleaning.  But, if you have larger hands than most, you may want to consider skipping this purchase.

Just a quick review on the sauce brush.  It is very good for detail work on your BBQ.  It holds a nice amount of sauce and I did not detect any brush marks that could take away from your appearance scores.

Thanks for stopping by,

Bill