Search This Blog

Sunday, December 30, 2012

2012: Year in Review

Well, 2012 is drawing to a close for everyone.  First off, we would like to wish everyone a safe, happy,  healthy, and prosperous New Year.  We have been very fortunate this year to be able to compete again as a family and with friends.  We were able to visit with old friends and make some new friends with each event we attended.  We saw steady improvement as the year progressed and we hope to build upon our small successes in 2013.

Soon we will comb through the dates for next year's events.  Once we have chosen our dates, we will post a new page with our tentative schedule for 2013.

As we say farewell to 2012, here is a summary of the past year in photos...


See you again in 2013!

Thanks for stopping by...

Bill

Wednesday, December 26, 2012

Biltong. Call it What you Want, but don't Call it Jerky...

Biltong?  What is that?  Sounds strange, but it tastes wonderful.  For those who don't know, biltong is spiced, dried beef, South African style.  Biltong can also be made with ostrich and other game meats available in South Africa.  Don't call it jerky, or you might find yourself in a pointed discussion with a Springbok vehemently arguing the finer points between jerky and biltong.  What are the main differences?

1. Biltong is usually cut thicker than jerky.
2. Biltong has a sweeter taste than jerky due to the spice profile.  I'll agree to this point when compared to traditional jerky.  But there are so many jerky rubs and marinades on the market now, this is not necessarily the case these days.
3. Biltong gets a vinegar bath.

My brother in law introduced me to this South African delicacy  many years ago while I was visiting him and my sister in London.  Ever since we purchased our smoker, I have toyed with the idea of making a smoked variety.  I finally got down to some serious R&D this past week...

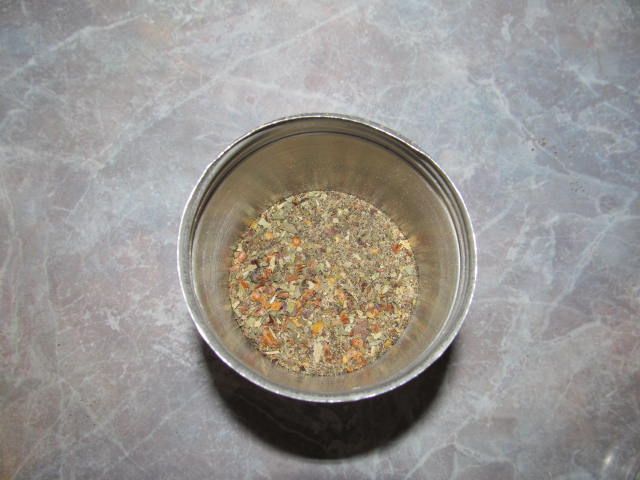
The main spice and flavor profiles come from sugar, coriander, and the vinegar marinade.  I had no idea where to start for a recipe.  So, after some diligent web research, I found one that sounded good.  I used this recipe on Food.com that received some good reviews by South Africans whose biltong was confiscated by US Customs and were in need of a biltong fix.  I have found other recipes that use cider vinegar instead of red wine vinegar.  I ran out of red wine vinegar, so I made up the difference with cider vinegar.  I liked how the cider taste came though, so I think for my next batch, I will use entirely apple cider vinegar.  You could use other types of vinegar as well to adapt to your own tastes.  

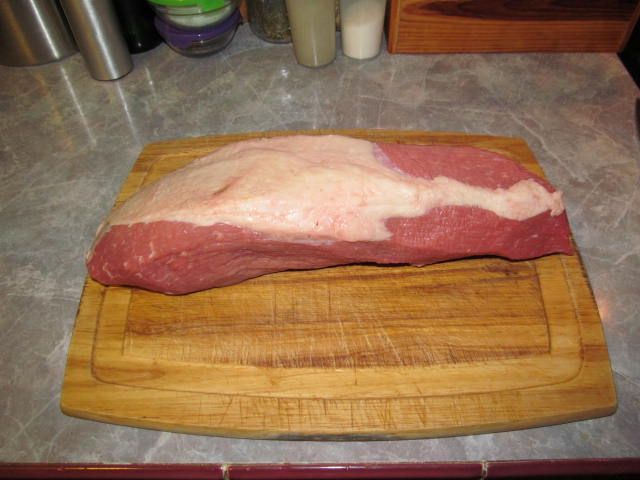
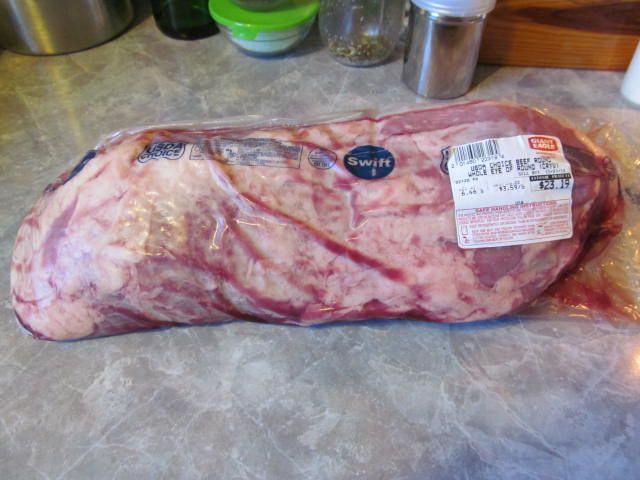
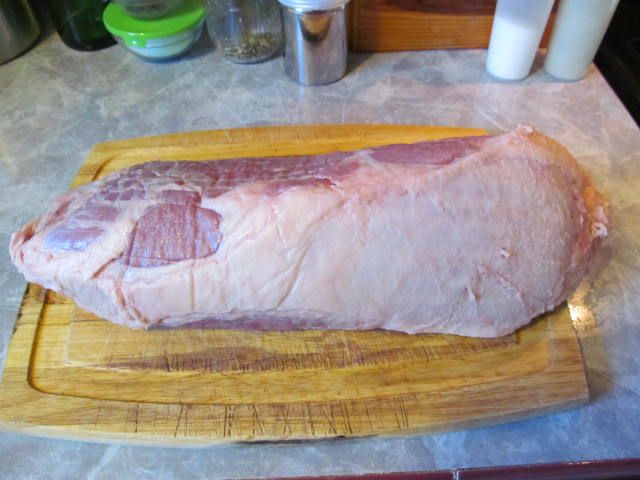
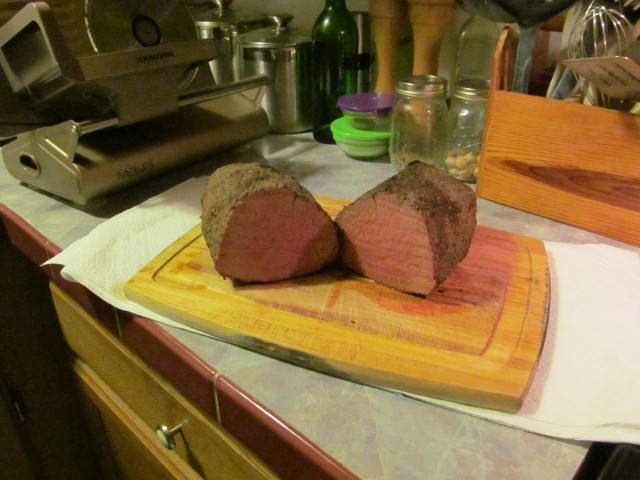
First, I took an eye of round and trimmed as much of the fat and silver skin away that I could...


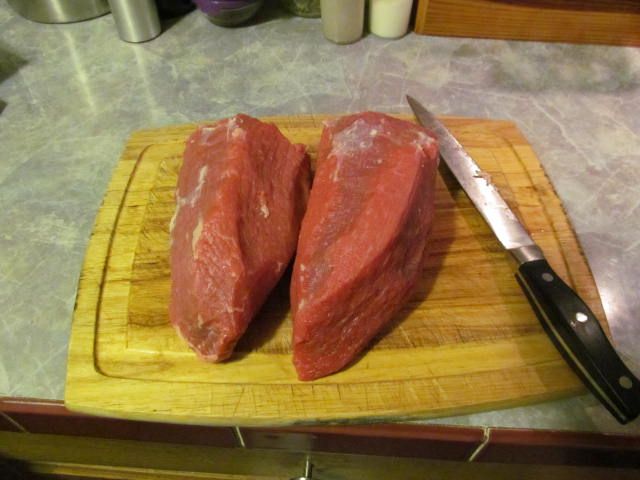
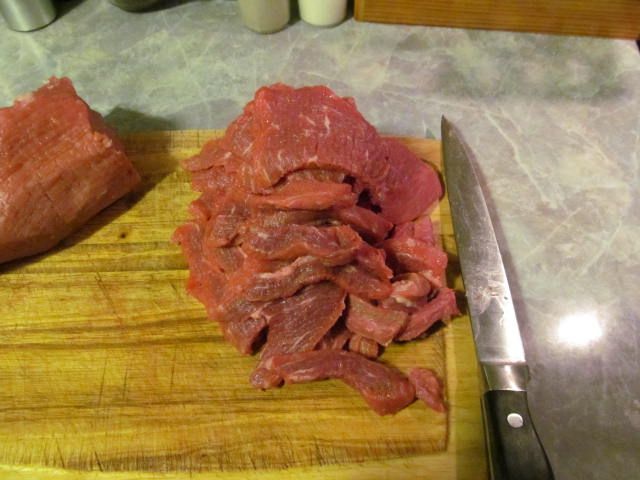
After cutting in half, I cut 1/4 inch slices with the grain of the meat.  When I came to the end of the slicing and my fingers came into play, I flipped the remaining meat on its flat end and cut thick, 1/4 inch strips...


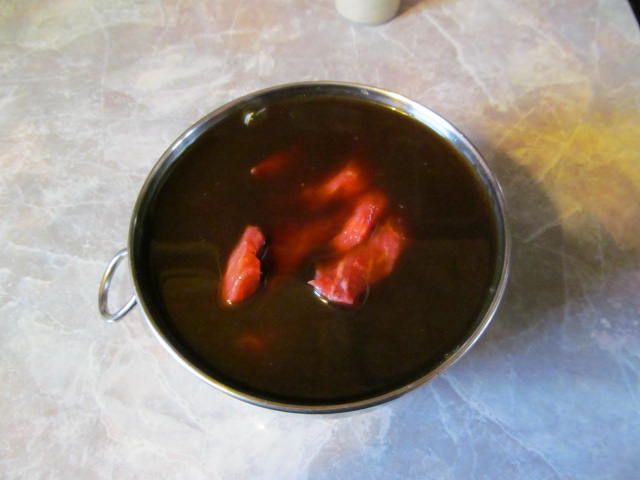
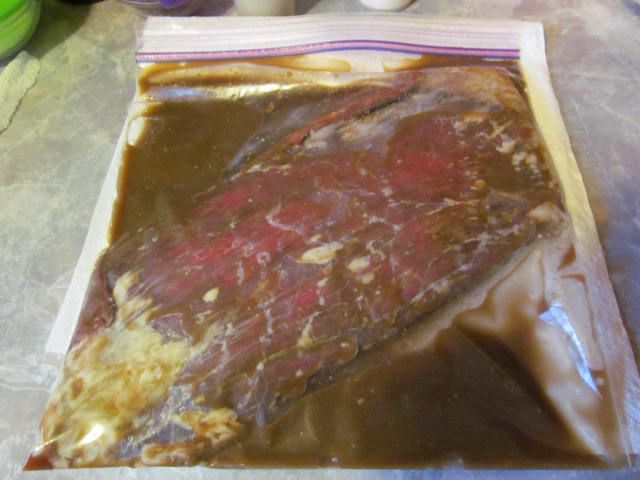
Next, I packed the sliced meat into a bowl and covered with the marinade.  Swim time?  30 minutes...


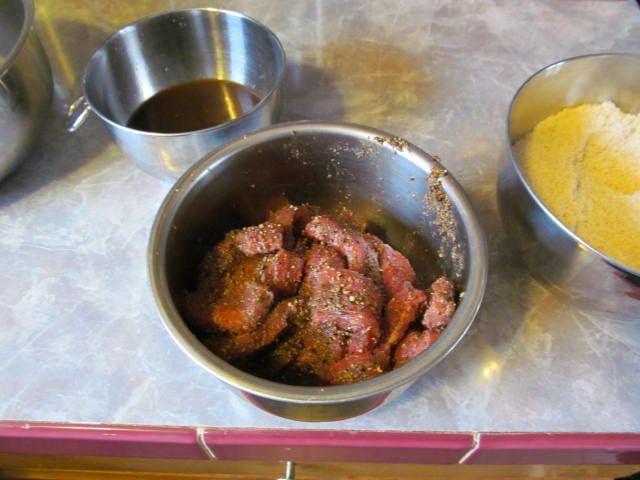
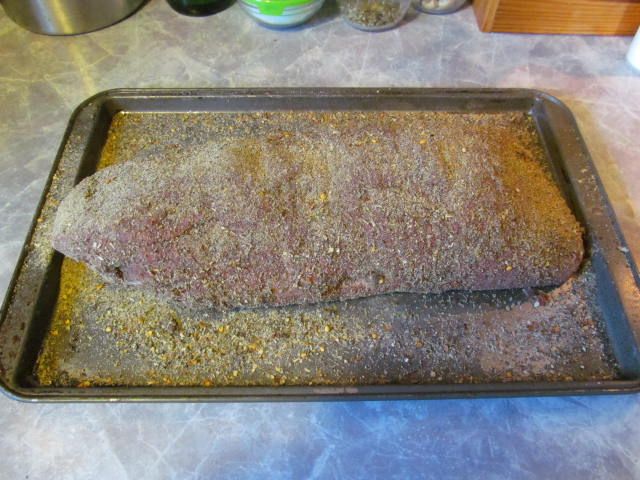
Then, I ground up some coriander and black pepper into a bowl and thoroughly covered the meat with the spices after the marinade...


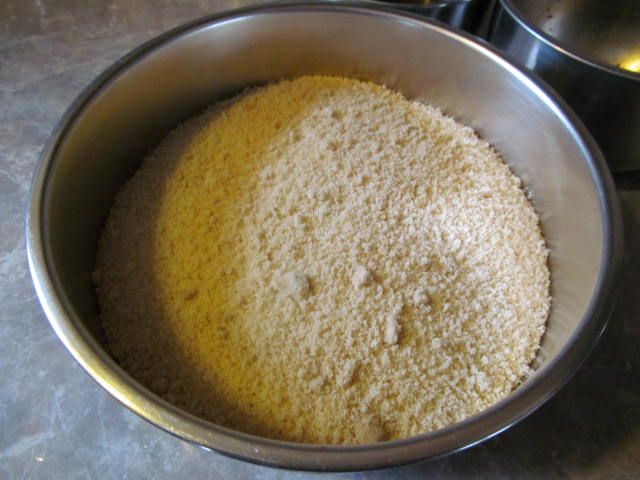
Here is the part that some of you that are salt conscious might have trouble with.  Take the spice covered meat, place into a bowl, and bury with the salt, sugar, baking soda mix...


Don't worry, we'll take care of that salt later.  The meat stays buried for 3 hours.  During that time, the salt acts to remove the water from the meat which starts the drying process.  After three hours, I removed the meat from the mixture, leaving as much of the solid behind as possible, and placed into a clean bowl.  See how the salt pulled the moisture from the meat?  The meat even felt firmer.  


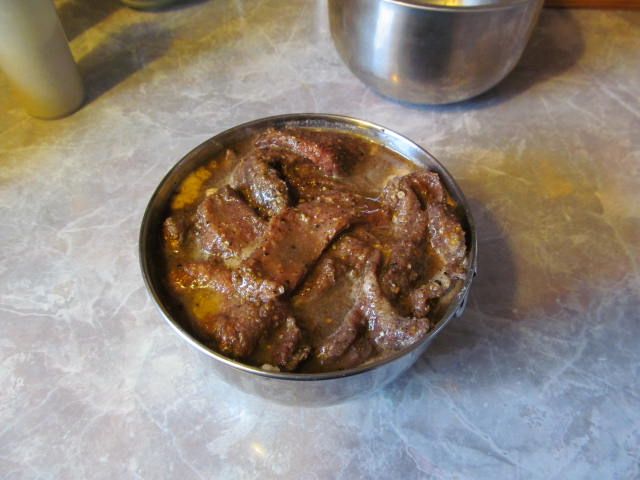
The meat then went back into the reserved marinade for five minutes to start the rinsing process...


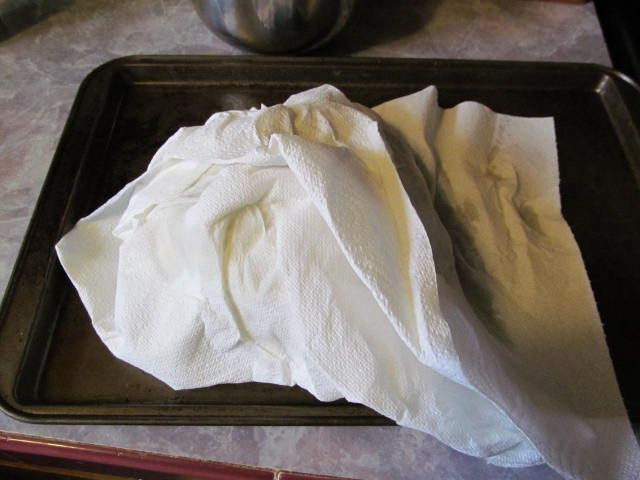
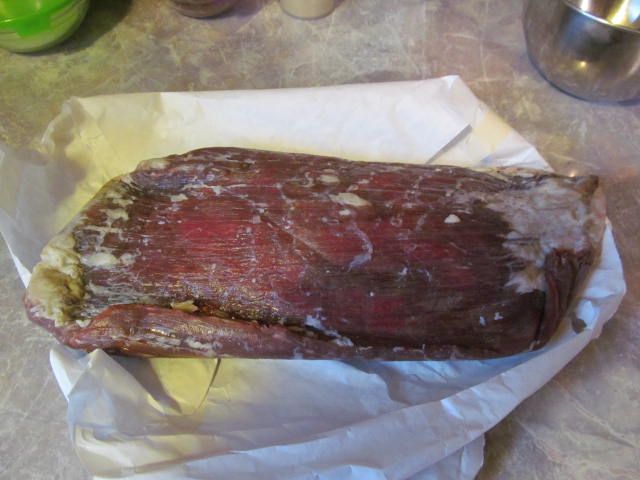
After five minutes in the marinade, I rinsed each piece of meat in fresh apple cider vinegar to remove as much salt as possible.  Do yourself a favor and add this step like I did.  It ensures that you actually get dried meat and not dried salt sticks.  After rinsing, I place the meat in paper towels, then squeezed as much of the liquid out of the meat that I could...


Here is what the meat looked like after squeezing.  As you can see, the salt has started to dry the meat already...


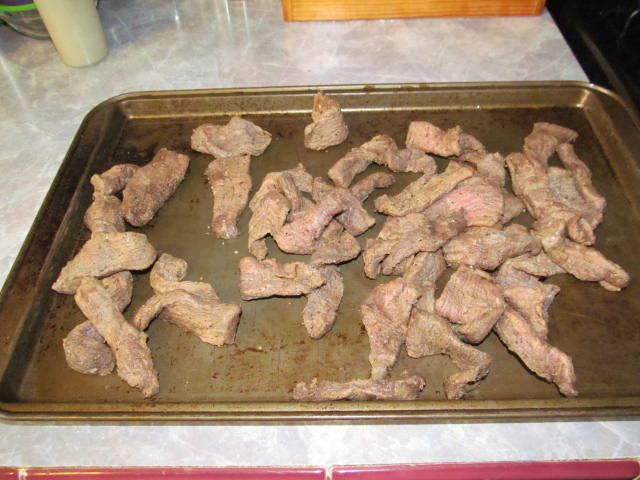
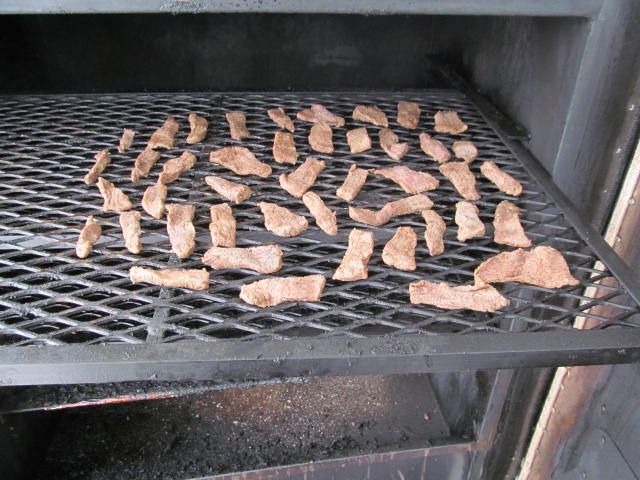
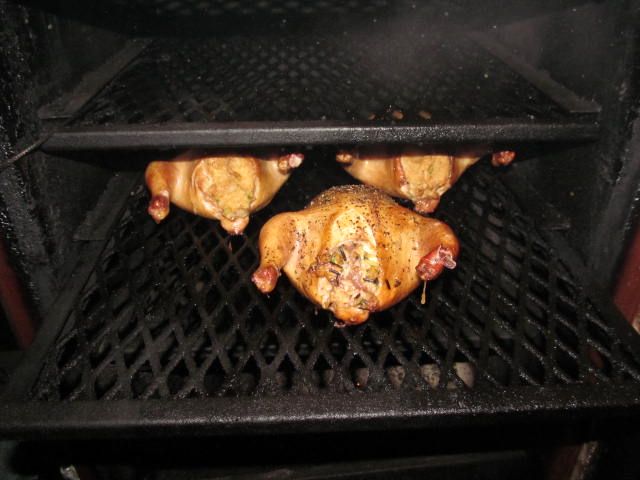
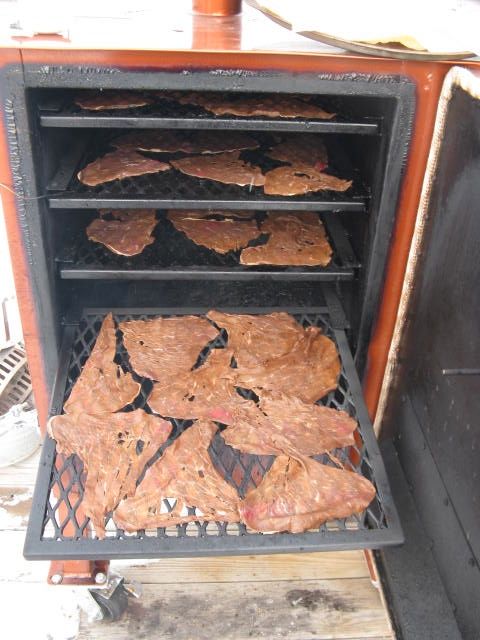
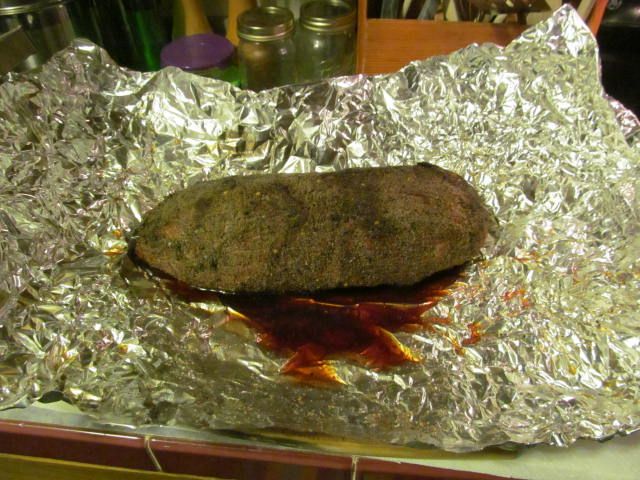
Here is where I really deviate from biltong making, but it was a necessity to add that smoke flavor that I was looking for.  The traditional way to make biltong is to tie a piece of string to each piece and hang in a dry place for anywhere from 3-20 days to dry out the meat.  I place the meat in my smoker at 125 F so that I could add some smoke while drying out...


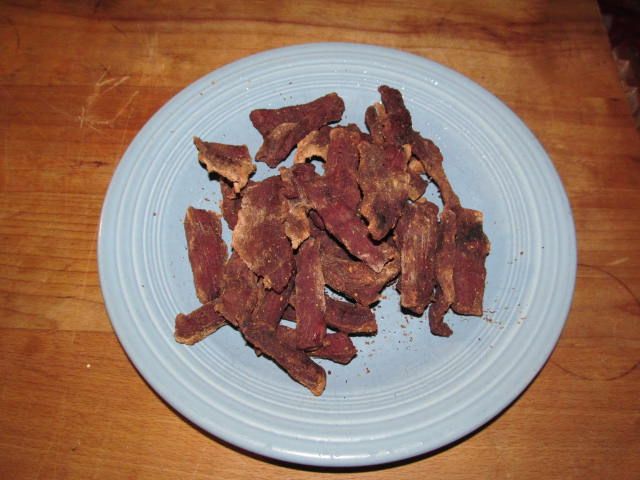
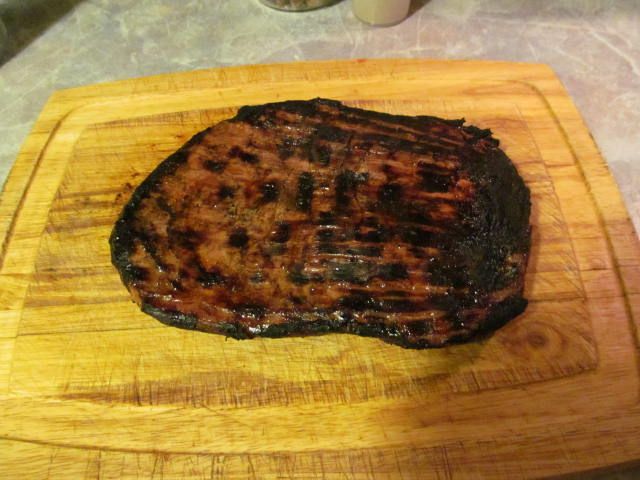
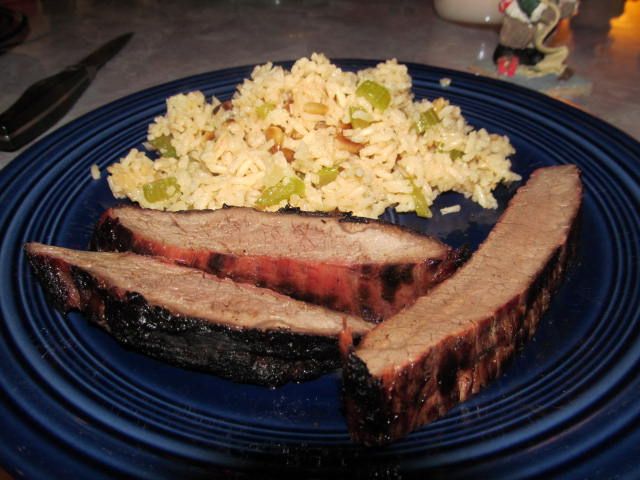
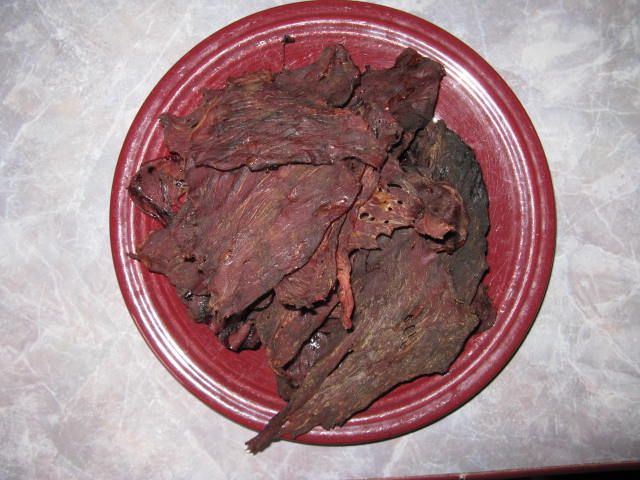
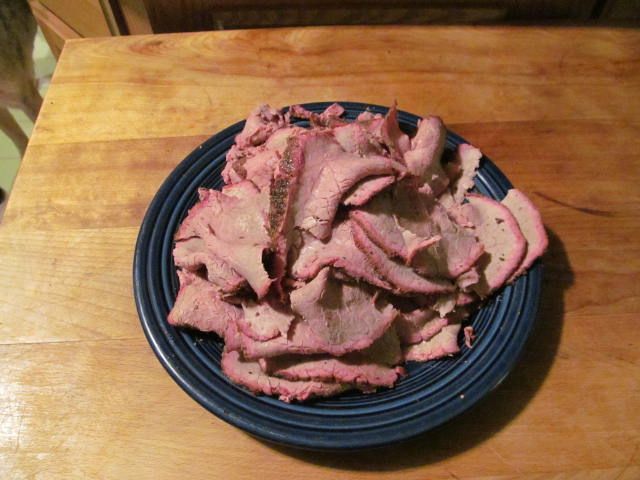
Picking this temperature allowed the meat to: stay uncooked for the most part, it allowed me to impart some smoke flavor (I used oak), and it shortened the drying process to about six hours total.  Here is the final product...


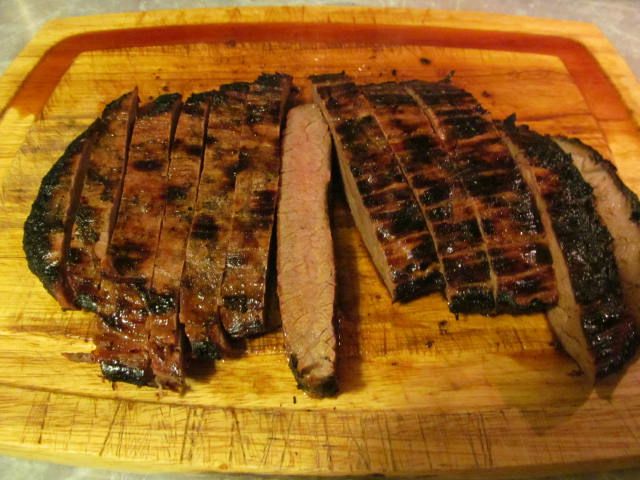
The smell of vinegar, coriander, and oak smoke was intoxicating while the meat was on the smoker.  I couldn't wait for that first bite.  As it turned out, I did a really good job for my first time making this South African treat.  The meat does have the texture of boot leather.  But, once you start chewing, the vinegar comes out and mixes with the coriander with a shot of flavor that is hard to describe, but satisfying none the less.  If you are tired of the usual jerky, I suggest that you give biltong a try.

Thanks for stopping by...

Bill

Tuesday, December 25, 2012

Merry Christmas!

All of us here at Three Dogs BBQ would like to wish everyone a Merry Christmas!  We hope that Santa was good to all of you.


Thanks for stopping by...

Bill

Saturday, December 22, 2012

Orange - Ginger Marinaded Flank Steak

We love flank steak around here.  Our butcher always has good looking steaks of high quality and low fat.  So, whenever he has them on sale, we stock up for those nights when we are looking for some good beef without all the fat.  The only problem is that a flank steak can turn into shoe leather if not cooked properly.  A good marinade is the solution.

I am partial to Asian flavors when cooking flank steak.  I just like how the Asian flavor mingles with that rich beefy taste.  Today, we are looking at a concoction with orange and ginger flavors.

First, I thawed the steak, rinsed well, and patted dry...


Then, I mixed my marinade:

1/2 cup Orange Juice (the acid helps to break down the proteins in the meat, helping to tenderize)
1/4 cup of Moores Beef Marinade.  We like this as it is one of the lower salt marinades on the market.  Soy sauce will work here as well.
1 Tbsp of Garlic Ginger paste.  Available at any Indian market.
1 Tbsp of Sesame Oil

I whisked it all together and combined in a plastic bag with my steak...


Every time I walked into the kitchen I flipped the bag over to ensure an even marinade.  The longer you let the meat sit in the marinade, more flavor will be imparted in the end product and the meat will be  more tender.  This one marinaded for about 5 hours.

To cook, I got a screaming hot grill and placed the steak directly over the coals.  I closed the lid, then flipped after 5 minutes.  After 5 minutes on the second side, I pulled from the grill and let the steak rest on a cutting board for 5 minutes before slicing...


Still medium in the middle.  I could have pulled this one a little earlier.  But, still moist and tender with hints of orange, garlic, and ginger.  We served this with a side of ginger accented rice pilaf.

For the pilaf, I sauteed sweet onion and celery in some olive oil, then added 1/2 tsp of ground ginger powder to the saute at the end...


This mixture was placed in 2 cups of beef broth and 1 cup of uncooked rice.  Brought to a boil, covered the pot, and simmered for 20 minutes..


While the rice was cooking, I lightly toasted some pine nuts in a skillet on low heat.  You do not need to add oil to the skillet, but you do need to keep your eye on them so they do not burn...


When the rice was cooked, I added the toasted pine nuts and served with the sliced flank steak...


Thanks for stopping by...

Bill

Wednesday, December 19, 2012

Cornish Hens, Stuffed Two Ways...

Well, over the weekend, Hope and I were on the same wavelength for a Sunday dinner idea: smoked and stuffed Cornish hens.  I was thinking sort of a Greek style, rice stuffing.  She wanted home style, Thanksgiving stuffing, so we did both.

I looked for fresh Cornish hens, but I could not find them in my travels.  So, I settled for your standard 22 oz frozen hen from Tyson.

First, I made my standard poultry brine...


BOS's Chicken Brine:

Ingredients:
1 gallon Water
¾ cup Kosher Salt
¾ cup Brown Sugar
2 Tbsp Granulated Garlic
2 Tbsp Chili Powder
¼ cup Orange Juice
⅛ cup Worcestershire Sauce

... and put the hens in the pool for a 7 hour swim.  Make sure to fill the body cavity with brine so they sink and not float...


Next, the stuffing.  For the rice stuffing, I did the following:

Made one box of Uncle Ben's Wild Rice Blend.
Tore up a handful of fresh spinach leaves into quarters.
Added about 2 Tbsp of crumbled feta cheese.
Added 2 heaping soup spoons worth of wild rice mixture, then mixed well.


For the bread stuffing, Hope made a batch of her mothers homemade Thanksgiving bread stuffing.  You could use the same or, if you do not have a homemade recipe, boxed instant stuffing will work as well...


Next, we stuffed the hens.  Do not pack the stuffing into the hen tightly as the stuffing will not cook in the time that it will take the bird to cook...


Once stuffed, the hens get a coating of suntan lotion (olive oil) and healthy grind of sea salt and fresh black pepper...


The smoker was already pre-heated to 350 F.  So, I added four chunks of pecan into the ash pan.  Once I had nice blue smoke rolling out of the chimney, I put the hens on the third rack down on a four rack Stumps Baby.  Here they are after 30 minutes...


After 50 minutes total, the hens had reached 165 F internal.  So, time to pull...


Nice golden brown skin.  Just what we like.

For a side, I caramelized some sweet onion and garlic.  Then, added a bag of fresh spinach and covered with the lid.  Stir the spinach every 5 minutes or so while on low heat until cooked down...


A surely tasty meal for sure...


The Cornish hen had a nice nutty taste from the pecan.  Juicy and moist.  Not dried out at all.  The meat was so good, Hope even ate the dark meat!  But, the hen was a bit on the salty side.  Next time, I will reduce the time the hens have in the brine down to 4-5 hours down from the 7 hours in this instance.  The rice stuffing was nice and creamy due to the added feta with a slight, spinach taste.  A perfect accompaniment to this hen for sure.  We will definitely be making this again in the future.

Thanks for stopping by...

Bill

P.S.  Special thanks go to Chilebrown over at Mad Meat Genius for saying that you can smoke a stuffed bird...

Saturday, December 15, 2012

Moink Balls, a Holiday Appetizer Idea

A Moink Ball?  What is that you say?  Well, they don't come from little furry Moinks.  I am not even sure how the name got started.  What I do know is, they are little meaty treats packed with lots of flavor.

A Moink Ball is a lot like a Fattie.  You can use any meat, any spice, and any stuffing, just so that you can roll it up and wrap it in bacon.

For ours, I used sweet Italian sausage.  I cubed up some mozzarella cheese into bite sized pieces.  I did not add any rub to the sausage mix.  As you take a hunk of sausage goodness and roll into a meatball sized shape, I pushed a piece mozzarella into the middle so that you get a nice cheesy surprise when you bite into the middle.  For half of the treats below,  inserted a jalapeno slice along with the cheese for a bit of spice.

Once the balls are made, wrap with bacon and place on a smoker set for 350 F.  I used oak wood for this cook.  If you have never tried oak with sausage, you have to give it a try. They were made for each other.

Anyway, cook the balls for 45-60 minutes on your middle smoker rack.  After 45 minutes, start pushing down on the ball to check for doneness.  When the Moink Ball feels firm and the bacon is crisp, you are ready to eat...


Perfect, juicy, morsels of sausage goodness.  When the bacon is added, you will peg the taste meter for sure.

Make more than you think you need as they will go fast.  Serve with toothpicks and a dipping sauce.  I used a marinara for these.

Thanks for stopping by...

Bill

Monday, December 10, 2012

Beef Jerky Anyone?

One thing that I just cannot get enough of is good beef jerky.  Slim Jim's don't count.  The only problem is that my butcher always sells out.  So, I decided to try to make some on my own.  It is easy and tasty.  The good part is, you can vary your flavors to your own taste.

So, where do I start?  Well, I used Alton Brown's Jerky Marinade as a starting point.  I followed the recipe exactly, except I left out the liquid smoke.  I added that on my own.

After mixing up a batch of marinade, I used 2 lb of chip steaks that I purchased from my local butcher.  Into the marinade they went for an over night swim.

After the overnight marinade, I poured into a colander to drain, then laid the steaks flat on cookie racks to dry for about three hours.

Then, I fired up the smoker and heated to about 150 F and placed some hickory wood in the pan.  I waited until the hickory was burning and giving a nice thin, blue smoke out of the stack.  Then, I layered the jerky on the smoker racks...


On a smaller smoker like the Stumps Baby, you need to keep your eye on the jerky.  After about an hour, the meat on the bottom was starting to dry out perfectly.  So, I just kept rotating the racks every 20 minutes until the meat had that dried jerky consistency.  Here is a picture of the final product...


Perfect dried jerky with a nice flavor.  You can store it in a paper bag for weeks at a time, if it lasts that long ;)  If your jerky is slightly wet, keep your paper bag in the refrigerator so that it does not mold due to the moisture.

You can use the marinade recipe above as a base.  One variation that I tried and liked for the marinade was:

2/3 cup Worcestershire Sauce
2/3 cup of soy sauce
1 small can pineapple juice
2 teaspoons freshly ground black pepper
2 teaspoons onion powder
1 tablespoon of Ken's Buffalo Wing Sauce or equivalent

If any of you have some homemade jerky marinade recipes, please share them here for all to try.

Thanks for stopping by...

Bill


Saturday, December 1, 2012

Outside the Box: Smoked Italian Beef

This past weekend was our last tailgate of the season and I wanted to do something special.  Also, since it was the weekend after Thanksgiving, I knew I didn't want a poultry product as well.  So, I thought a bit and did some searching.  What I came up with was an Italian Beef Sandwich where I just lightly smoked the beef.

I used this recipe from Amazing Ribs.  Yeah, I know, a rib website for a beef recipe?  You should stop over there.  They have some great recipes for ribs and lots of other good things.  What did I change?  Nothing, other than I lightly smoked the beef with some oak while roasting.  How did it turn out?  Well, on to the details...

First, I found a 6 lb eye of beef round on sale at our local grocery.  As you can see, not much fat on this piece of beef...


The fat was only on one side, so I trimmed it off and cleaned the silver skin off of the back side.  Here is the finished product...


I made a double batch of the rub since the meat was twice the size called for in the recipe and rubbed all over...


I fired up the smoker and brought to a temperature of 350 F and added 2 small chunks of oak into the ash pan.  Then, I put the eye of round on the third rack down...


I flipped after one hour to get an even brown all over, then pulled at an internal temp of 135 F, wrapped in foil and let sit on the counter for two hours to cool...


The smell drifting out of the foil was intoxicating.  Even more so after opening the foil to slice...


Then, we cut in half to slice...


Finished product...


Perfect medium rare on the small side, perfect rare on the thick side.  A nice light smoky flavor, just a hit of oak.  I was tempted to make a sandwich then, but I settled for generous quality sampling.

I sauteed some green peppers...


And caramelized some sweet onion...


And made some beef broth for dipping sauce.  The caramelized onions go into the broth for serving...


Sorry, I didn't get any pictures of the end product at the tailgate.  But, you heat up the broth/onion mixture and add the beef slices to re-heat.  The beef gets piled high on crusty Italian rolls.  Traditional toppings are the sauteed green peppers or hot gardenia.  The masses loved it!

The next day, I topped with caramelized onion and provolone cheese and baked until the cheese was bubbly, then topped with horsey sauce.  If I had a kimmelweck roll, it would have been perfect for sure.

One more tidbit that I noticed.  The leftover broth that was used for heating the beef slices and as an Au  Jus for dipping the sandwiches had a wonderful flavor.  Lots of caramelized onions with a beefy, slightly smoky flavor.  It would have made an outstanding French Onion Soup with the addition of some spice, some croutons, and baked with a piece of provolone on top.  I will give that a try the next time I make this and I will definitely be making this again!

Thanks for stopping by...

Bill